Getting Started with Telepresence on Windows

Before you begin
Install Telepresence
Connect to your remote cluster
Run your service locally
Create an intercept
Troubleshooting
Telepresence is a powerful open source tool that allows you to code and test a service locally against a remote Kubernetes cluster. This allows you to quickly build and debug a local service that is dependent on a large number of remote services and resource-hungry remote middleware or databases. Telepresence is now available in developer preview for Windows and in this guide, you will learn how to install Telepresence and create an “intercept” to route traffic from your cluster to your local environment on Windows machines.
Before you begin
This article assumes that you have your own remote cluster with an application deployed that uses the microservices architecture and you want to intercept (or re-route) traffic to a service in that cluster. If you do not have your own cluster but would like to try Telepresence you can follow this quickstart with a free demo cluster from Ambassador Labs.
Prerequisites
- A Kubernetes cluster with a service you want to intercept
- kubectl (OpenShift users can use oc)
- Windows Powershell running as an administrator
Install Telepresence
Before you can start taking advantage of Telepresence, you need to install the application. There are a couple methods which you can choose to download the install file. At the moment, Telepresence for Windows is installed via a powershell script; future versions of Telepresence for Windows will be installed as a Windows exe. Newer Windows 10 machines (build 17063 or later) come with the “curl” command. If your computer has curl you can download Telepresence using this command in your Powershell session:
curl -fL https://app.getambassador.io/download/tel2/windows/amd64/latest/telepresence.zip -o telepresence.zip
In the case where you do not have curl installed you can download the install file using Invoke-WebRequest:
Invoke-WebRequest https://app.getambassador.io/download/tel2/windows/amd64/latest/telepresence.zip -o telepresence.zip
After the file is downloaded you’ll need to unzip it and clean it up by running the following commands:
Expand-Archive -Path telepresence.zipRemove-Item 'telepresence.zip'cd telepresence
Run the install-telepresence.ps1 to install telepresence's dependencies. By default Telepresence will be installed at C:/telepresence, but you may specify a custom path $path with -Path $path.
Set-ExecutionPolicy Bypass -Scope Process.\install-telepresence.ps1
A prompt will come up asking if you want to change the execution policy. Enter (Y) here and the install process will continue.

Finally remove the unzipped file with:
cd ..Remove-Item telepresence
Congratulations, you have successfully installed Telepresence on your Windows machine. Before moving on, make sure to close your Powershell and open a new one.
Connect to your remote cluster
Now that you have installed Telepresence and opened a new Powershell session, you can begin to connect Telepresence to your cluster and start intercepting your services. First make sure that you are in the correct context with the cluster and namespace of the services you’d like to intercept.
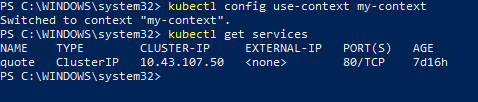
1. Use kubectl get services and make sure that you’re in the right namespace for the service you want to intercept. In my case, the “my-context” defaults to the namespace “foo” where I have my service called “quote."
2. Next run the
telepresence connect
3. The
telepresence list-n <namespace>
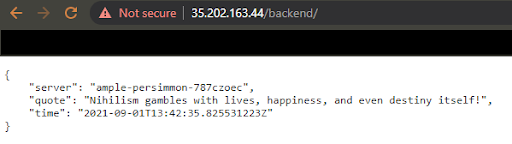
In my example, the quote service displays a random entry from a list of quotes. With a “curl” request to the quote service, we can access the remote service and see one of the entries from the list of quotes. The Telepresence DNS resolver dynamically resolves names using namespaces; access your remote service locally following the format of this command:
curl <service_name>.<namespace>
Replace <service_name> with the name of the service you want to intercept as listed in
telepresence list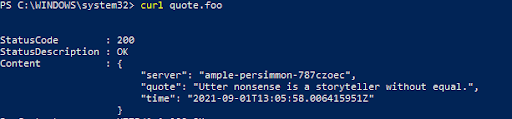
Run your service locally
Before you actually intercept your remote service, you should run a version of the service locally. Make a change to your local service in order to compare with the service in the cluster.
In my example, my local instance of the quote service has a new set of quotes. My service is deployed via Docker containers so I will create a new build and run the service using docker run.
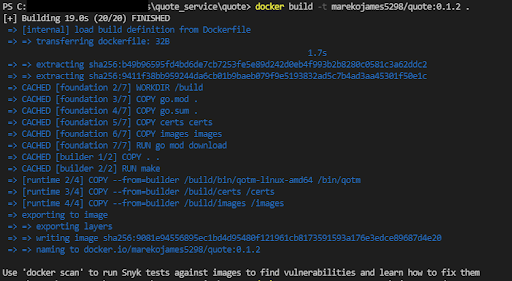
After you edit the code of your own local service, create a new build and run your service.

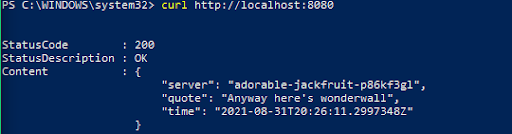
Take note of the port your local instance of the service is running on. It will be important in the next step. In my example, the quote service is running on localhost:8080 and returns one of the new quotes updated in the new build.
Create an intercept
Now that you have the service running locally, you can create an intercept with Telepresence to intercept traffic going to your service in the cluster and reroute it to your local instance. There are two methods of intercepting traffic you can do: intercept all traffic to the service or intercept certain requests to your service using a preview URL. In this example, we will use preview URLs to create a personal intercept that is shareable via a preview URL.
Telepresence login
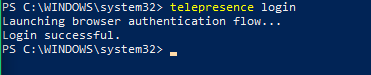
In order to use preview URLs you need to create an account here. Run
telepresence loginFollow the login process and return to your terminal:
Telepresence intercept
After logging in, you can create a personal intercept with the following command:
telepresence intercept <service_name> --port <local_port>
Replace <service_name> with the name of your service (as listed in telepresence list) and <local_port> with the port you indicated in the previous step.
Telepresence needs to know how your cluster is configured to properly set up the intercept, so it will ask you four questions about how your cluster ingress works.
- Your ingress layer 3 address: this will usually be the internal address of your ingress controller using the format <service_name>.namespace.
- Ingress layer 4 address: the port which your ingress controller is listening (usually 443 for TLS and 80 for non-TLS)
- Ingress TLS encryption: whether your ingress controller expects TLS communication on the specified port or not
- Layer 5 hostname: If your ingress routes traffic via a host name enter it here
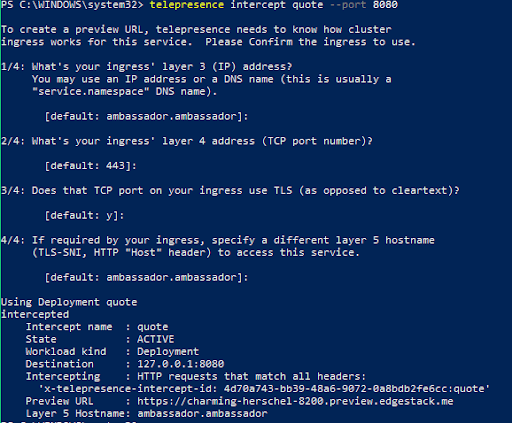
After answering the questions, telepresence will create the intercept and return a preview URL.
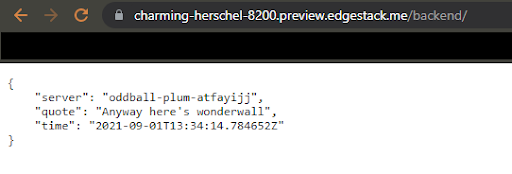
With the preview URL, traffic that was going to your remote service is now rerouted to the service running locally and you can test your changes as if they were already deployed in the cluster. I can access my quote service using the same prefix I normally would in the cluster.
Notice how the remote service in your cluster has been unaffected. In my example, it still returns one of the old quotes.
Telepresence’s preview URLs allow you to test and debug changes to your service without affecting the cluster or anyone else who may be working with the cluster. The preview URL can also be shared and is accessible to others, so collaboration becomes incredibly easy and simple.
Congratulations, you’ve successfully installed Telepresence and created an “intercept” routing traffic from your cluster to your local environment!
Troubleshooting
If you encounter errors while trying to create or access your preview URL, you may have configured your intercept incorrectly. Use
telepresence leave <service_name>Find more troubleshooting tips here.