Getting Started with Kubernetes for JavaScript Developers
3 steps to containerize and deploy Node.JS apps to Kubernetes
Docker and Kubernetes: Key Components of a Containerized JavaScript Application
Simple Kubernetes Cluster Setup for JavaScript Applications with Minikube
Deploy Your JavaScript Application to the Minikube Kubernetes Cluster
Get Started Deploying JavaScript Applications to Kubernetes
3 steps to containerize and deploy Node.JS apps to Kubernetes
JavaScript has become a robust language powering complex web applications composed of microservices. Kubernetes is the leading orchestration platform for containerized applications, including JavaScript applications. Containerizing provides a way to package your application in a portable environment with all the necessary dependencies. This allows developers to easily manage their environments, scaling, and deployment strategies without having to change configurations for different infrastructure and platforms.
In this tutorial, we will walk through the steps to create a simple containerized JavaScript application and deploy it in a Kubernetes cluster.
Docker and Kubernetes: Key Components of a Containerized JavaScript Application
As a JavaScript developer, if you do not have exposure to Docker or Kubernetes, it’s recommended that you check their official documentation to grasp the basics of both technologies.
There are three main components when it comes to containerizing a JavaScript application.
1. Dockerfile
This is the file that contains all the commands for creating an image that can be used as the base for the container. Think of it as a package.json file that is not specific to the JavaScript application but to the complete environment.
A simple Dockerfile will contain a base image with a set of commands to create a new image containing the required JavaScript application. (For example, we can use the official Node.JS docker image as the base image in a NodeJs application. It is a secure and stable base image that mitigates the need to install and configure NodeJs. We just have to add the commands to include our application and configure the networking options.)
2. Kubernetes-- Deployment (deployment.yaml)
After creating an image using the Dockerfile, we need to deploy a container based on that image. To facilitate that, we can use a deployment file indicating which image to use, the number of instances of the application, etc.
3. Kubernetes-- Services (services.yaml)
By default, the deployed application will not be accessible outside of the Kubernetes cluster. Kubernetes Services provides a way to expose the underlying application to the wider Internet.
Simple Kubernetes Cluster Setup for JavaScript Applications with Minikube
Now that we know the three main components required to containerize and deploy a JavaScript application in a Kubernetes cluster, the next step is to do this practically. Before the deployment, we need to create a Kubernetes Cluster. If we are deploying in a cloud platform, almost all providers offer specialized Kubernetes solutions such as Amazon EKS, Azure Kubernetes Service (AKS), and Google Kubernetes Engine (GKE).
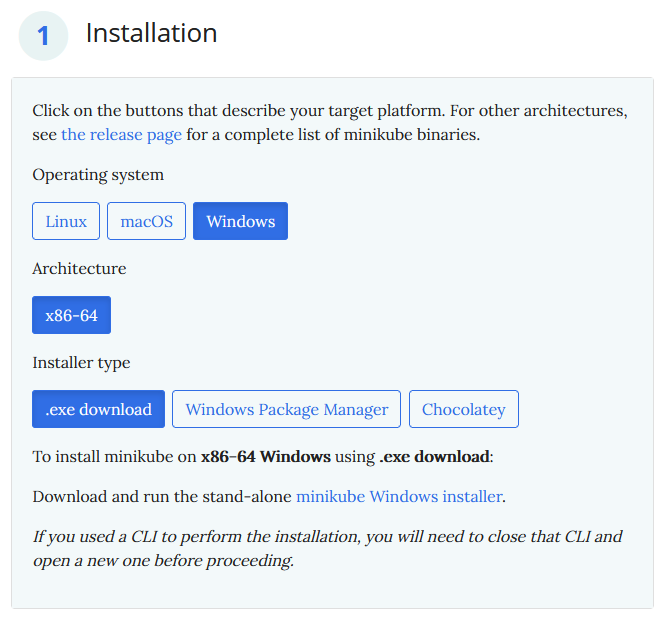
However, the easiest way to create a Kubernetes cluster in a local environment is using a tool called Minikube. It enables us to run a single-node Kubernetes cluster in Windows, Linux, or macOS. So let's see how to set up the Minikube software in a Windows environment.
Step 1: Download Minikube executable.
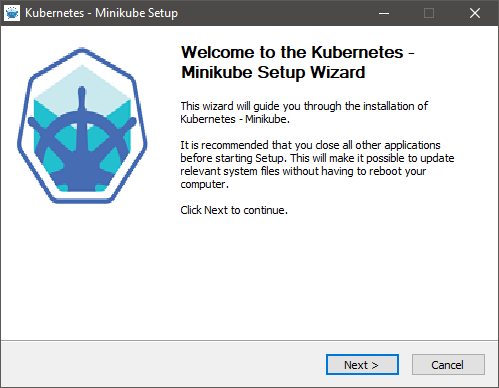
Step 2: Run the Minikube installer.
Step 3: Start the Minikube cluster. Open the command prompt as the administrator and run the "minikube start" command. When starting, users can specify some additional configurations to customize the Minikube Kubernetes cluster. (Ex: Limit the CPU and RAM amount
minikube start --cpus=2 --memory=1800m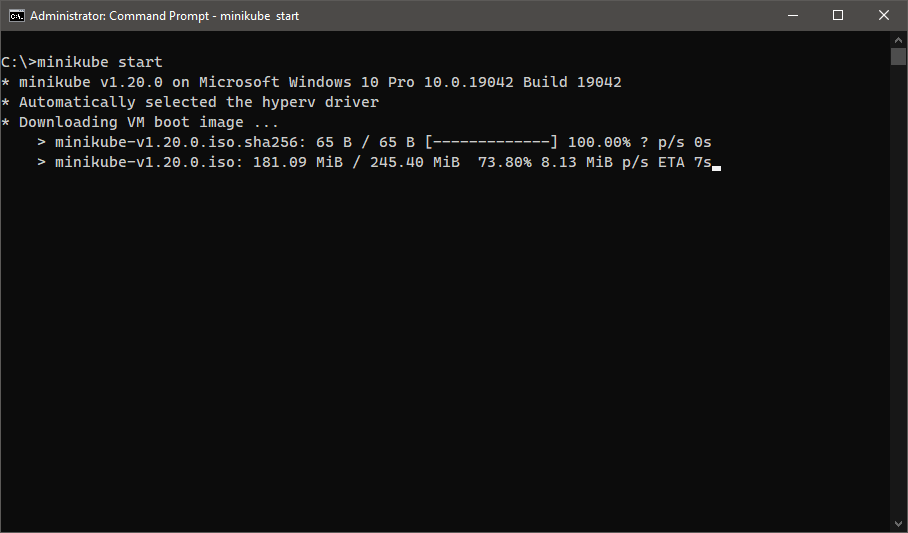
Step 4: Run
kubectl version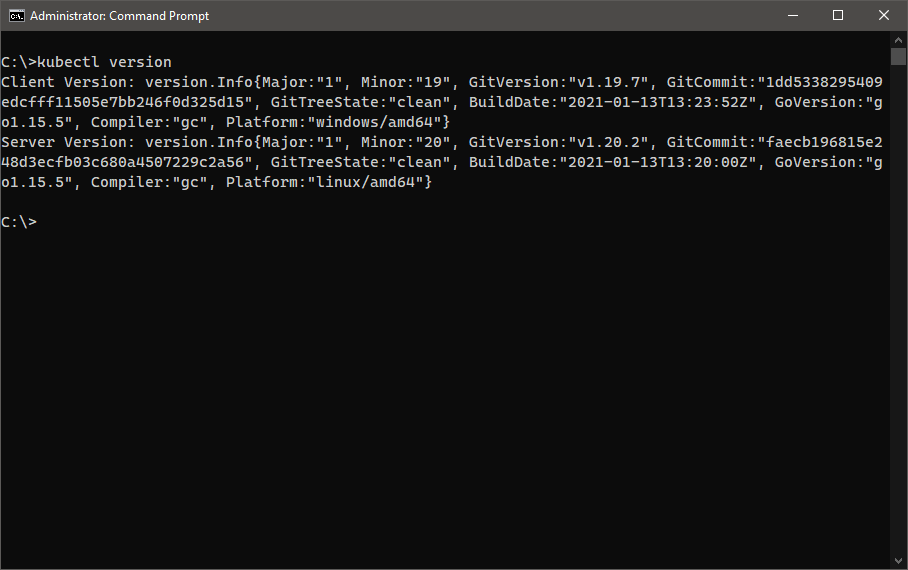
That's it, and now we have a working Kubernetes cluster! So let's go ahead and deploy the application.
Deploy Your JavaScript Application to the Minikube Kubernetes Cluster
Let's assume that we have the following JavaScript application called
test-appapp.js
var http = require('http');var port = 8000var server = http.createServer((request, response) => {response.writeHead(200, {"Content-Type": "text/plain"});response.end("Hello World")});server.listen(port)console.log("Server running at http://127.0.0.1:" + port)
package.js
{"name": "test-app","version": "1.0.0","description": "","main": "app.js","scripts": {"start": "node app.js"},"author": "test","license": "ISC"}
RESULT
Step 1: Create and Build the Dockerfile
We will use the above application to create our container image. First, let us create a Dockerfile. We will be using the official Docker image for Node.JS as the base image, and we will select the alpine variant due to its size. Alpine is a lightweight and security-focused Linux distribution that is ideal for containerized applications. The Dockerfile simply states the step-by-step process that is needed to be carried out to build an image.
Dockerfile
# Use the node:alpine image as the base imageFROM node:alpine# Copy the package.json file to the imageCOPY package.json package.json# Install required packagesRUN npm install# Expose the required port in the imageEXPOSE 8000# Copy any other necessary filesCOPY . .# Command to run the programCMD ["npm", "start"]
The next step is to build the Docker image. This build process is analogous to a software build process. Yet, it builds a complete environment eliminating the need for a separate deployment process to configure the application on a server. Simply run the docker build command to build the image.
docker build . -t myapp/nodetestapp
RESULT
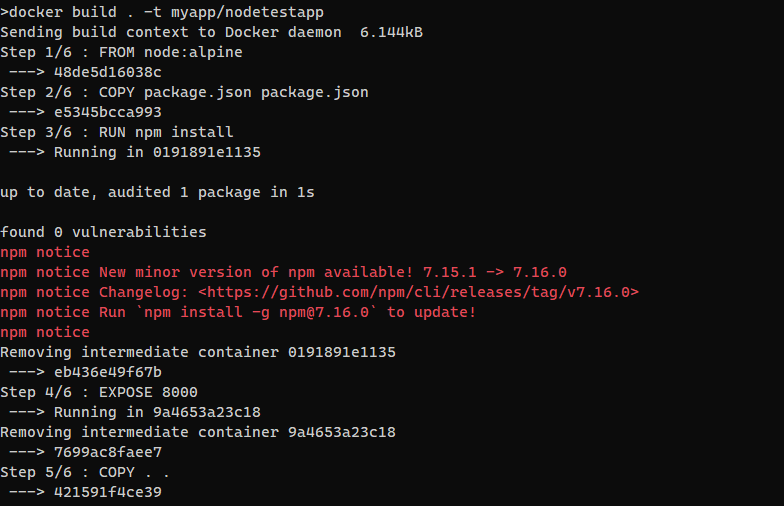
In the above result, the dot indicates the current directory while the -t parameter relates to a tag value which would be the image name. A successful build process will go through all our specified steps and create a deployable image. As we are building this locally, the image will be saved in the local image repository.
Step 2: Create the Kubernetes Deployment
Next, we need to deploy the image on the Kubernetes cluster we created earlier. Even though we can use terminal commands to deploy the image as a container, the recommended way is to use a deployment file as it will simplify the management of the application through a single file.
apiVersion: apps/v1# Indicates this as a deploymentkind: Deploymentmetadata:# Deployment namename: test-appspec:replicas: 3selector:matchLabels:app: test-apptemplate:metadata:labels:app: test-appspec:containers:# Container name- name: test-app# Image nameimage: myapp/nodetestapp# Indicate local image repositoryimagePullPolicy: Never# Resources for each containerresources:limits:memory: "128Mi"cpu: "500m"ports:# Ports to be open- containerPort: 8000
Note here that we specify the “imagePullPolicy: Never” to stop Kubernetes from looking for the image in external/online container repositories. The deployment finds the necessary pods to manage using the selector field, which matches the labels defined in the template section.
kubectl create -f deployment.yaml
RESULT
kubectl create -f deployment.yamldeployment.apps/test-app created
We can verify if the deployment is successful by checking the number of pods created. It will be the value we defined in the replicas field. (replicas: 3)
kubectl get pods
RESULT
Step 3: Create the Kubernetes Service
Since the application is deployed now, the next step is to expose it to the world. We can use a Kubernetes service for that. When defining the service, the most important field is the selector, which is similar to a variable that indicates which Kubernetes pods to expose. Same as in the deployment, this will look for pods with a matching label field called ("app: test-app") and expose them using the service.
apiVersion: v1# Indicates this as a servicekind: Servicemetadata:# Service namename: test-app-servicespec:selector:# Selector for Podsapp: test-appports:# Port Map- port: 80targetPort: 8000protocol: TCPtype: LoadBalancerkubectl create -f services.yaml
RESULT
kubectl create -f service.yamlservice/test-app-service created
That's it, you have successfully deployed a JavaScript application in a Kubernetes cluster! You can simply check the running services in a production environment and get the external IP and connect to the application.
kubectl get services
RESULT

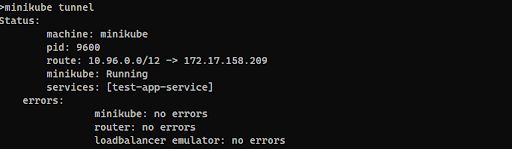
However, you can see that the EXTERNAL-IP is indicated as pending in the above output. The reason is that we are running this deployment in a local environment using Minikube. Simply run the Minikube tunnel command to associate a network route that would expose the external IP to the host operating system. (In our example, Windows operating system)
minikube tunnel
RESULT
Finally, open up a different command prompt and check the running Kubernetes services. There, you can find an EXTERNAL-IP associated with our service.
kubectl get services
RESULT

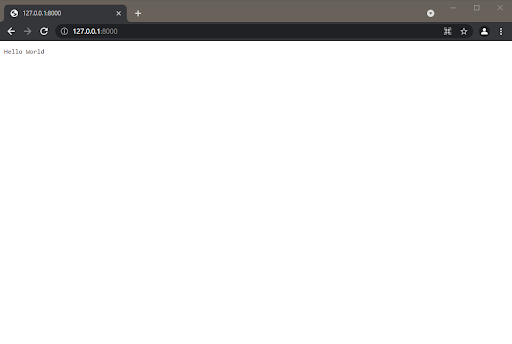
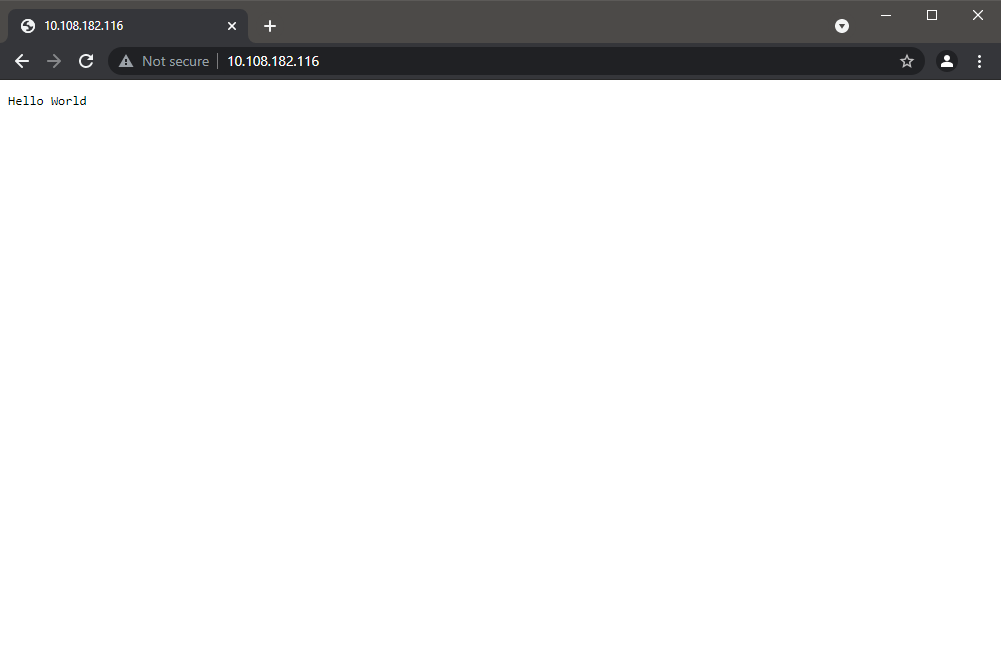
Navigate to the URL in a browser to access the containerized javascript application.
Get Started Deploying JavaScript Applications to Kubernetes
Containerization provides us with a vast array of benefits, from creating portable applications to simplified scaling and management. As a JavaScript developer, you can eliminate any complications that occur within the final deployment of a software project by moving to a containerized application. The reason is that it allows the developer to tailor a custom environment designed for that specific application. Furthermore, containerization allows you to simply move your application from one Kubernetes cluster to another using a few simple commands.
The best way to learn Kubernetes as a JavaScript developer is to get hands-on with the tools at every stage of the process.
- Join our community Slack