
Test your code changes quickly and locally with Telepresence and Jenkins
As cloud-native deployments in Kubernetes increase the challenges for safely updating code and delivering changes are compounding. Developing microservices for Kubernetes applications poses a significant challenge for developers. Effectively testing updated microservice code falls into a few options:
- Spin up a new K8s cluster: This has several problems: It’s expensive and time consuming. It’s also difficult to isolate specific code changes in this scenario; multiple changes are often grouped together to save time and resources. This can complicate troubleshooting and root cause analysis.
- Maintain a shared K8s cluster for testing: These tend to turn into “wild wild west” environments quickly. If updates aren’t carefully gated and rigorously tested the clusters can require significant resources to debug issues, creating a bottleneck to continuous integration. Shared test environments also frequently get out of sync with production environments, resulting in incomplete testing and possible outages in production.
Services are designed to handle traffic and code changes can be disruptive or even catastrophic. Deploying updated microservice code can destabilize environments, impacting groups or developers, or customers. Code changes need rigorous testing, but how can you test new code without deploying into a cluster?
Ambassador Labs’ Telepresence offers quick, non-intrusive testing of code changes in your Kubernetes microservices. Telepresence allows you to test un-deployed code locally against a running application on a remote K8s cluster without impacting the running version of the service. You can extend that to automated testing in a CI/CD pipeline easily. I’m going to show an example of a Jenkins pipeline executing a simple test against some demo code. A success will continue the pipeline, a failure will stop the pipeline and send a notification.
Getting started with Jenkins and Kubernetes
You need a Kubernetes cluster running a ‘production’ app. A TLS certificate is necessary for the pipeline to connect. In this test, the app is called “verylargejavaservice” which is comprised of several microservices. Once deployed your cluster should look like this:
$kubectl get pods
NAME READY STATUS RESTARTS AGE
dataprocessingservice-685cb9 1/1 Running 0 21h
verylargedatastore-98d78d474 1/1 Running 0 21h
verylargejavaservice-689dbc8 1/1 Running 0 21h
Your Jenkins system will need to have the Kubernetes-CLI plug-in installed. Pipelines will use this to provide the connectivity between the agent node and the K8s cluster. This will allow you to execute
kubectl
commands inside the pipeline. Different CI solutions have their own mechanism for providing K8s connectivity inside a pipeline. In the example below there are six values passed via the plugin:
- credentialsId: A set of Jenkins credentials for the content user. Note this is the “ID” of the credentials, not the name. These may already exist, or can be created as you configure the pipeline
- caCertificate: The CA cert that is deployed on your cluster. Paste the full certificate text in single quotes.
- server URL: The URL of your K8s cluster
- contextName: The K8s context for your user
- clusterName: The name of your K8s cluster
- nameSpace: The K8s namespace the app runs in
The last three items can be looked up via
kubectl
or by viewing your kubectl configuration file.
You also need somewhere for your build and test to run, an agent node. The build and test don’t need to run on the same agent node, but it certainly removes overhead. For this test I have NodeJS and Telepresence deployed on my agent node.
Setting up your Jenkins pipeline
In the UI of your Jenkins instance, select “New Item” from the left pane. Give the pipeline a unique name, select “Multibranch Pipeline” from the options, and click ‘“OK”.

Since we’re using Github to secure and audit our pipeline, which is stored in a file called “Jenkinsfile”, all we need to configure for the pipeline is the SCM. Under “Branch Source” select ‘Github’. Fill in (or create) credentials for this repository and put the HTTPS URL for the repo. Save the pipeline.
The Jenkinsfile we’ll create should be added to the repository where your microservice code is stored. This will automatically create individual instances of the pipeline for each branch in your repo, allowing you to run pipelines against development, QA, and production in unique invocations.
If you’re already running a build pipeline in Jenkins, you can use the code in the example below to add to your existing pipeline along with any other testing stages. If possible, run them in parallel with other tests to shorten the build cycle time.
If you haven’t already, consider adding webhooks to your repo to automatically trigger a pipeline run when code is checked or a PR is created to fully automate testing.
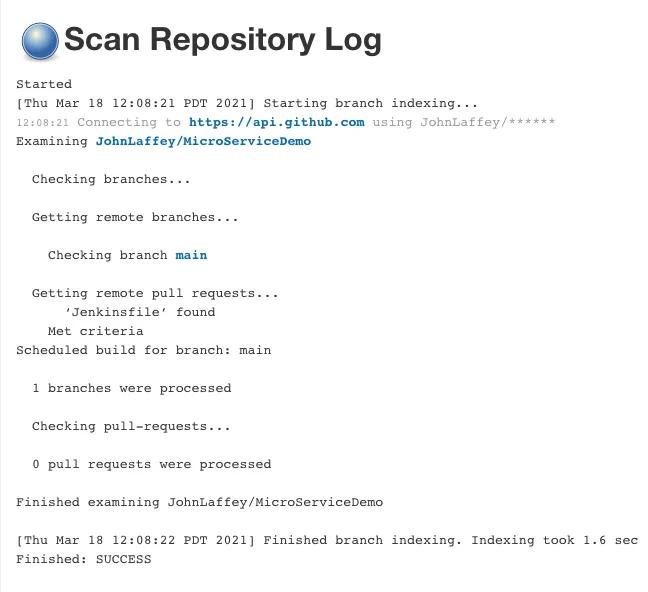
Saving the new pipeline will trigger Jenkins to go out and scan the repo for branches and existing Jenkinsfiles. If your repo is large this can take several minutes. Once it’s done you should see the output of how many branches and Jenkinsfiles it found. (One warning: if the scan finds existing Jenkinsfiles in the repo it will try to execute them.)
Coding the test in a Jenkinsfile
The purpose of this pipeline stage is to perform a simple test of the microservice. It does this by curling the URL of the microservice to test for the correct return value then comparing it to the expected value.
- If the test returns true the pipeline can continue with additional steps such as pushing the change to the appropriate repo, building and deploying the new microservice code, etc.
- If the test returns false the pipeline is failed.
Here is the Jenkinsfile for your repository:
pipeline {
agent {
node {
label 'tp'
}
}
stages {
stage('stageone') {
environment {
color = 'purple'
}
steps {
withKubeConfig([credentialsId: 'e1edc5dd-52de-42fe-9451-732149a23353',
caCertificate: 'MyClusterTLSCertificate',
serverUrl: 'https://mykubernetes',
contextName: 'kubernetes-admin@kubernetes',
clusterName: 'kubernetes',
namespace: 'default'
])
{
dir("/home/kube/edgey-corp-nodejs/DataProcessingService") {
sh 'npm install&'
sleep 10
sh '(npm run start&)'
sleep 15
sh 'telepresence connect'
sleep 10
sh 'telepresence intercept dataprocessingservice --port 3000 --mount=false'
sleep 10
sh 'result=$(curl -s "http://localhost:3000/color")'
}
}
}
}
stage('stagetwo'){
steps {
sh 'result=$(echo $result | tr -d '///"')'
sh ''' if [[ "$color" != $result ]]
then
currentBuild.result = 'FAILURE'
error ('Values do not match, stopping pipeline')'''
}
}
}
post {
unsuccessful {
echo 'This build has failed.'
}
}
}
Breaking down the pipeline commands
This example is a single step, with a post action, that connects the agent node to the running Kubernetes cluster via t. The rest of the code in the step works as follows:
dir(“/Users/me/ambassador/edgey-corp-nodejs/DataProcessingService”)
This switches into the directory path for execution of the subsequent for subsequent command.
sh ‘npm install&’`& `sh ‘(npm run start&)’
These two commands start nodejs and start the updated microservice code on the agent node.
sh ‘telepresence connect’
This starts Telepresence and connects it to the Kubernetes node using the parameters specified in the ‘withKubeConfig’ block. The Jenkins agent node should be running either as root or as a user with `NOPASSWD` specified in sudoers.
sh ‘telepresence intercept dataprocessingservice — port 3000 — mount=false’
This command creates an intercept, a Telepresence proxy for the running service, on port 3000. The intercept allows the new microservice code running on the agent node to interact with the application running in the K8s cluster but restricts traffic only to requests coming in on the local machine’s port 3000. Traffic to the original microservice copy running in the K8s cluster remains unaffected.
sh ‘result=$(curl -s “http://localhost:3000/color")'
Here we are querying the local copy of the service, running on the agent node, for the comparison value and storing it in the variable $result.
One note on the variables, lines 30&31: The curl command returns double quotes which are in the variable. Line 31 strips those out so only the value remains.
if [[ "$color" != $result ]] thencurrentBuild.result = 'ABORTED' error ('Values do not match, stopping pipeline')
Here the pipeline evaluates the variable $result against $color. If the values don’t match the pipeline is failed and the error “Values do not match, stopping pipeline” is returned to the Jenkins output. If the values match the step completes and the pipeline, in the real world, continues with additional stages and steps.
Alternatives
In this approach I’ve walked through the steps in a dir{} block for illustrative purposes. Another viable method would be to script the test and call the script in the pipeline. While that may inhibit some visibility it gives you the flexibility to version the script (in SCM, of course!) and test new iterations without impacting the ‘production’ version.
I’ve used Jenkins as it is a very popular CI solution that I have used extensively but many other CI offerings exist. The syntax may change but the concept is the same.
Summing Up
Leveraging Telepresence allows developers to do real world testing of microservices, at scale, without the overhead of a rollout and the possible disruption failures can cause in running clusters. Automating testing with Telepresence in Jenkins and other CI tools helps speed code to production by failing fast (before deployment), promoting stability (by not interrupting deployed microservices for testing), and improving the delivery process through intelligent automation.